| (4 dazwischenliegende Versionen desselben Benutzers werden nicht angezeigt) | |||
| Zeile 34: | Zeile 34: | ||
== Step-by-step instructions == | == Step-by-step instructions == | ||
===Prepare Outlook=== | ===Prepare Outlook=== | ||
| − | Microsoft has greatly simplified the | + | Microsoft has greatly simplified the setup process for email accounts in Outlook. This means that not all settings can be configured manually anymore. For a smooth setup, we recommend changing this default setting. Unfortunately, this is only possible via a registry change. We provide a registry patch in our download portal. |
<br> | <br> | ||
| + | |||
| + | <bootstrap_card color=info header="Details: What does this patch do?" collapsible> | ||
| + | * Switches off the simplified account setup. | ||
| + | ** This means that all setup parameters for a mailbox are available again: | ||
| + | **Display name, email address, mail server, TLS/SSL ports for IMAP & SMTP etc. | ||
| + | * When using the ZIM exchange service, the current email address is requested from Office 365, which leads to constant login dialogs. This registry patch prevents this. | ||
| + | * Archiving function: For the archive function, Outlook does not take into account the creation date of an object (mail, calendar, task, note), but when this object was last changed. | ||
| + | ** If an email is opened or moved, the "changed" date is also reset. | ||
| + | ** The email may therefore no longer be in the period that should be archived. | ||
| + | ** This also applies to other elements such as calendars, tasks, notes or journal entries. | ||
| + | ** This registry patch changes the behavior. | ||
| + | ** After restarting Outlook, objects are now archived according to the creation date. | ||
| + | </bootstrap_card> | ||
| + | <br> | ||
| + | |||
| + | <bootstrap_alert color=danger> | ||
| + | <span style='font-size:30px;'>⚠</span> Do not make any changes to the Windows registry yourself! | ||
| + | </bootstrap_alert> | ||
| + | <br> | ||
| + | |||
Open the [http://download.uni-paderborn.de/pc/configs/Outlook/ download portal]. | Open the [http://download.uni-paderborn.de/pc/configs/Outlook/ download portal]. | ||
[[Datei:Outlook19-unter-Win-10-01.png|links|thumb|ohne|350px]] | [[Datei:Outlook19-unter-Win-10-01.png|links|thumb|ohne|350px]] | ||
| Zeile 46: | Zeile 66: | ||
* Unpack the zip archive. | * Unpack the zip archive. | ||
* To do this, right-click on the file. | * To do this, right-click on the file. | ||
| − | * Then click '''"Extract all..."'''. | + | * Then click on '''"Extract all..."'''. |
<br clear=all> | <br clear=all> | ||
| − | [[Datei:Outlook19-unter-Win-10-03.png| | + | [[Datei:Outlook19-unter-Win-10-03.png|left|mini|ohne|350px]] |
<br> | <br> | ||
| − | * Click '''"Extract"'''. | + | * Click on '''"Extract"'''. |
<br clear=all> | <br clear=all> | ||
| Zeile 61: | Zeile 81: | ||
[[Datei:Mail-unter-outlook19-05.png|links|mini|ohne|350px]] | [[Datei:Mail-unter-outlook19-05.png|links|mini|ohne|350px]] | ||
<br> | <br> | ||
| − | * Click '''"Run"'''. | + | * Click on '''"Run"'''. |
| − | * Confirm the | + | * Confirm the security warning that appears with '''"Yes"'''. |
<br clear=all> | <br clear=all> | ||
[[Datei:Mail-unter-outlook19-06.png|links|mini|ohne|350px]] | [[Datei:Mail-unter-outlook19-06.png|links|mini|ohne|350px]] | ||
<br> | <br> | ||
| − | * Confirm the registry | + | * Confirm the change to the registry with '''"Yes"'''. |
<br clear=all> | <br clear=all> | ||
| Zeile 76: | Zeile 96: | ||
<br clear=all> | <br clear=all> | ||
| − | The Outlook | + | The Outlook default settings have now been changed. |
| − | === | + | ===Setting up Outlook=== |
[[Datei:Outlook-classic-icon.png|links|mini|ohne|150px]] | [[Datei:Outlook-classic-icon.png|links|mini|ohne|150px]] | ||
<br> | <br> | ||
* Start Outlook. | * Start Outlook. | ||
<br clear=all> | <br clear=all> | ||
| − | |||
[[Datei:Screenshot Outlook19 RibbonDatei.png|links|mini|ohne|350px]] | [[Datei:Screenshot Outlook19 RibbonDatei.png|links|mini|ohne|350px]] | ||
<br> | <br> | ||
* Open Microsoft Outlook. | * Open Microsoft Outlook. | ||
| − | * Click File | + | * Click on File in the top left corner. |
<br clear=all> | <br clear=all> | ||
| − | + | [[Datei:Exchange einrichten in Microsoft Outlook 2019 (Windows 10) 01.png|links|mini|ohne|350px]] | |
| − | [[Datei: Exchange einrichten in Microsoft Outlook 2019 (Windows 10) 01.png|links|mini|ohne|350px]] | ||
<br> | <br> | ||
| − | * Click '''"Add | + | * Click on '''"Add account"'''. |
<br clear=all> | <br clear=all> | ||
| − | [[Datei: Exchange einrichten in Microsoft Outlook 2019 (Windows 10) 02.png|links|mini|ohne|350px]] | + | [[Datei:Exchange einrichten in Microsoft Outlook 2019 (Windows 10) 02.png|links|mini|ohne|350px]] |
<br> | <br> | ||
| − | * Fill the " | + | * Fill in the "Email address" field with '''"username@ex.uni-paderborn.de"'''. |
| − | * Replace | + | * Replace "username" with your personal username for your university account. |
| − | * ''' | + | * '''Leave the other fields blank in any case, do not enter a name or password'''. |
| − | * We continue by clicking '''"Next"'''. | + | * We continue by clicking on '''"Next"'''. |
| − | '''Info:''' This is the technical email address for | + | <br clear=all> |
| + | '''Info:''' This is the technical email address for setting up Exchange. This is not intended for sending or receiving emails. You only need it for setting up. | ||
<br clear=all> | <br clear=all> | ||
[[Datei:Exchange einrichten in Microsoft Outlook 2019 (Windows 10) 03.png|links|mini|ohne|350px]] | [[Datei:Exchange einrichten in Microsoft Outlook 2019 (Windows 10) 03.png|links|mini|ohne|350px]] | ||
<br> | <br> | ||
| − | * We now see the Windows security | + | * We will now see the Windows security prompt. |
| − | * Do not enter your password, but click '''"More | + | * Do not enter your password, but click on '''"More options"''' further down. |
<br clear=all> | <br clear=all> | ||
| − | [[Datei: | + | [[Datei:Netzlaufwerk_einbinden_Win_10_Netzwerkanmeldeinformation.PNG|links|mini|ohne|384x384px]] |
<br> | <br> | ||
* Now first click on '''"Use another account"''' at the bottom. | * Now first click on '''"Use another account"''' at the bottom. | ||
| − | * Then enter '''"username@ad.uni-paderborn | + | * Then enter '''"username@ad.uni-paderborn"''' in the top field. |
| − | * Replace | + | * Replace "username" with your personal username from the university account. |
* Enter the password for the university account in the field below. | * Enter the password for the university account in the field below. | ||
| − | * | + | * Check the box '''"Save login data"'''. |
| − | * | + | * Click '''"OK"''' to continue. |
<br clear=all> | <br clear=all> | ||
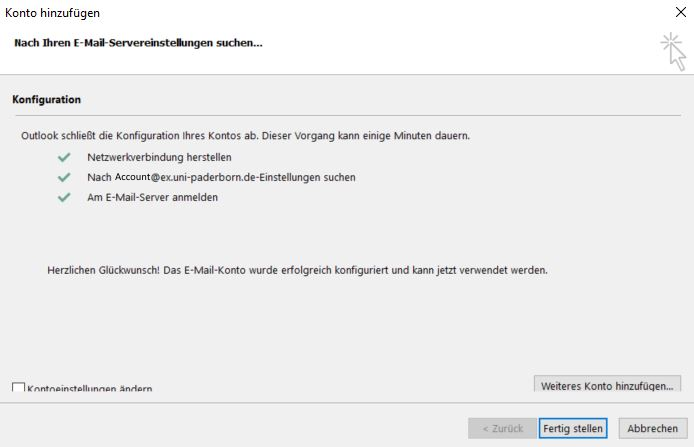
[[Datei:Outlook 2016 Exchange Serverabfrage.png|links|mini|ohne|350px]] | [[Datei:Outlook 2016 Exchange Serverabfrage.png|links|mini|ohne|350px]] | ||
<br> | <br> | ||
| − | *Your account | + | * Your account is now being set up. This may take a few minutes. |
| − | * Click '''"Finish"''' when the account | + | * Click '''"Finish"''' when the account has been set up |
* Your Exchange account is now set up and ready to use. | * Your Exchange account is now set up and ready to use. | ||
<br clear=all> | <br clear=all> | ||
Aktuelle Version vom 31. Januar 2025, 11:16 Uhr
What needs to be done?[Bearbeiten | Quelltext bearbeiten]
- Unlock advanced account setup in Outlook.
- Open Microsoft Outlook.
- Add new Exchange account.
- Set up the Exchange account with the technical address username@ex.uni-paderborn (instead of username, please use your uni account name).
- Use username@ad.uni-paderborn.de as username (also please use your uni account name instead of username here).
Requirements[Bearbeiten | Quelltext bearbeiten]
- Microsoft Outlook version 2019, 2021 or 365
- The Outlook (new) app from the Microsoft Store is not supported.
Safety notice[Bearbeiten | Quelltext bearbeiten]
Under Windows, only use the classic program Microsoft Outlook from the Microsoft 365 package. You can download it like this:
| Do not use the Microsoft Store app Outlook for Windows that is preinstalled under Windows 11. |
- The use of Outlook for Windows (NEW) for email accounts at the University of Paderborn is blocked.
- Background: Microsoft Sync is active in the new versions of Outlook. This gives Microsoft direct access to your mailbox and login details. This function therefore violates the terms of use for the university account.
Step-by-step instructions[Bearbeiten | Quelltext bearbeiten]
Prepare Outlook[Bearbeiten | Quelltext bearbeiten]
Microsoft has greatly simplified the setup process for email accounts in Outlook. This means that not all settings can be configured manually anymore. For a smooth setup, we recommend changing this default setting. Unfortunately, this is only possible via a registry change. We provide a registry patch in our download portal.
Details: What does this patch do?
- Switches off the simplified account setup.
- This means that all setup parameters for a mailbox are available again:
- Display name, email address, mail server, TLS/SSL ports for IMAP & SMTP etc.
- When using the ZIM exchange service, the current email address is requested from Office 365, which leads to constant login dialogs. This registry patch prevents this.
- Archiving function: For the archive function, Outlook does not take into account the creation date of an object (mail, calendar, task, note), but when this object was last changed.
- If an email is opened or moved, the "changed" date is also reset.
- The email may therefore no longer be in the period that should be archived.
- This also applies to other elements such as calendars, tasks, notes or journal entries.
- This registry patch changes the behavior.
- After restarting Outlook, objects are now archived according to the creation date.
⚠ Do not make any changes to the Windows registry yourself!
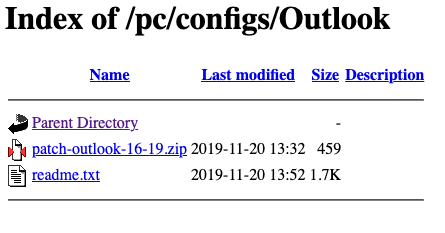
Open the download portal.

- Download the file "patch-outlook-16-19.zip".
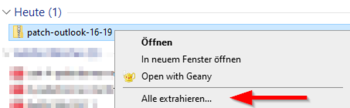
- Unpack the zip archive.
- To do this, right-click on the file.
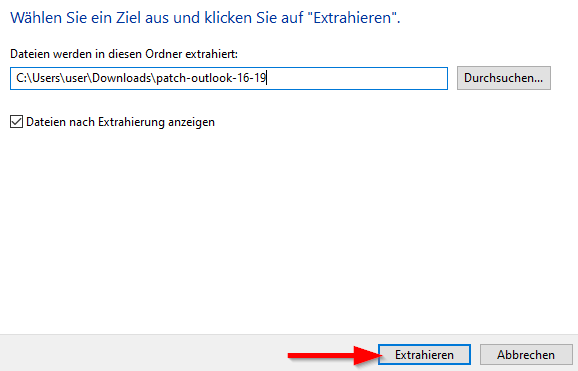
- Then click on "Extract all...".
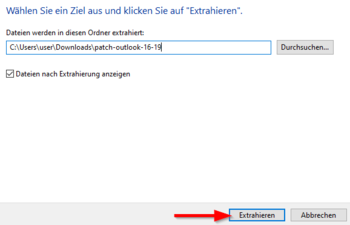
- Click on "Extract".
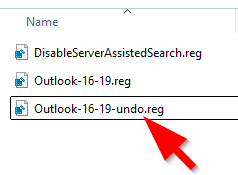
- Open the file Outlook-16-19 with a double click.
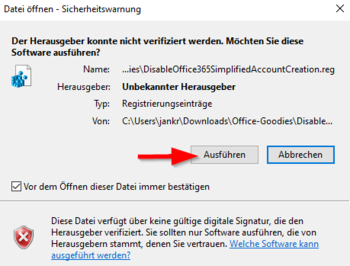
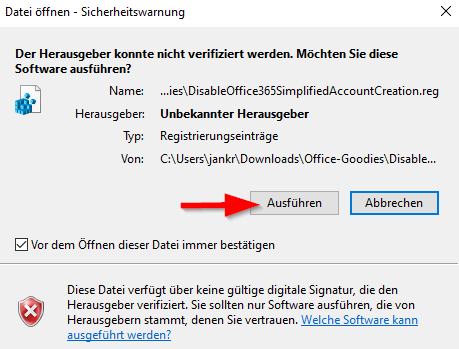
- Click on "Run".
- Confirm the security warning that appears with "Yes".
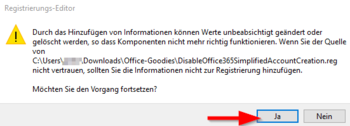
- Confirm the change to the registry with "Yes".
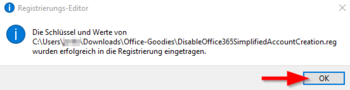
- The change has been made.
- Close the window with "OK".
The Outlook default settings have now been changed.
Setting up Outlook[Bearbeiten | Quelltext bearbeiten]
- Start Outlook.
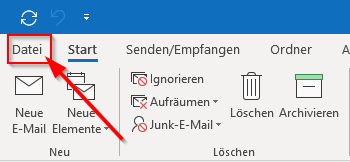
- Open Microsoft Outlook.
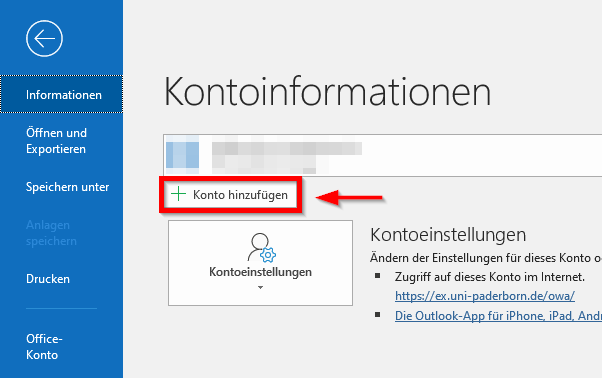
- Click on File in the top left corner.

- Click on "Add account".

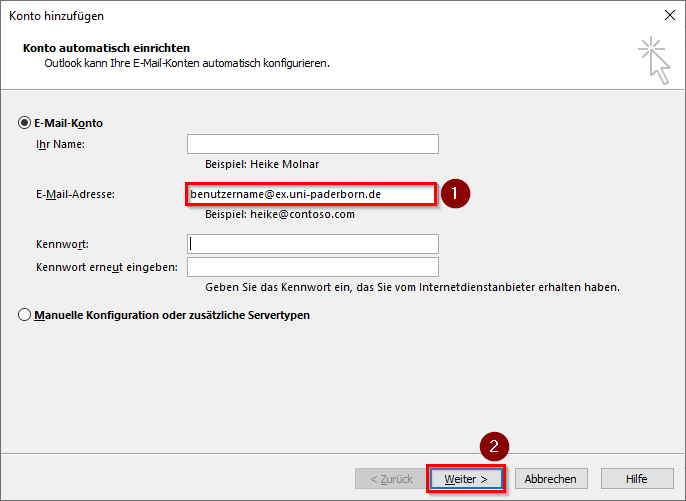
- Fill in the "Email address" field with "username@ex.uni-paderborn.de".
- Replace "username" with your personal username for your university account.
- Leave the other fields blank in any case, do not enter a name or password.
- We continue by clicking on "Next".
Info: This is the technical email address for setting up Exchange. This is not intended for sending or receiving emails. You only need it for setting up.

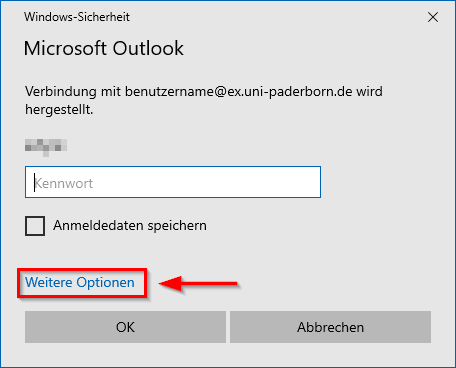
- We will now see the Windows security prompt.
- Do not enter your password, but click on "More options" further down.

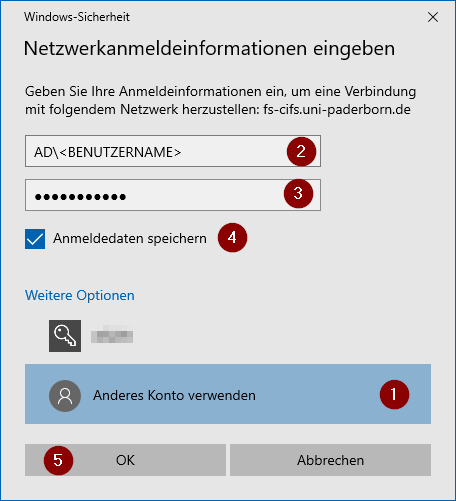
- Now first click on "Use another account" at the bottom.
- Then enter "username@ad.uni-paderborn" in the top field.
- Replace "username" with your personal username from the university account.
- Enter the password for the university account in the field below.
- Check the box "Save login data".
- Click "OK" to continue.

- Your account is now being set up. This may take a few minutes.
- Click "Finish" when the account has been set up
- Your Exchange account is now set up and ready to use.
Further information[Bearbeiten | Quelltext bearbeiten]
If you receive a login dialog again when you start Outlook for the first time, repeat entering the account details from point (3) "Use another account...".
Private mailbox[Bearbeiten | Quelltext bearbeiten]
By applying the registry patch from these instructions, the setting up of private mailboxes is only possible to a limited extent. It may be that email mailboxes from other providers can no longer be synchronized or can no longer be set up. This affects mailboxes from Gmail and Outlook.com, among others. Modern authentication methods such as OAuth are required for these mailboxes. Setting up private mailboxes on work devices is not recommended. If this is still necessary:
- Set up the University of Paderborn's email mailbox according to the instructions above.
- Then use the patch "Outlook-16-19-undo"' provided by us to undo the Windows registry changes.
- After that, setting up mailboxes using modern authentication methods is possible again.
⚠
- Do not make any manual changes to the Windows Registry!
- This could damage your system.


_01.png)
_02.png)
_03.png)